Kitchen Survival Recipe Guide
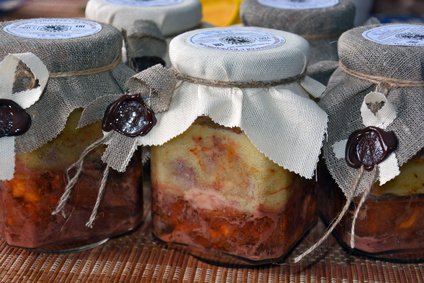 The outdoor kitchen is very much like the indoor kitchen a hundred years ago. If you cook on an outdoor grill or go camping, you pretty much know how it is already.
No refrigeration, everything depends on fire.
So long as you have fire, you can cook. A metal plate or grate and a pot, you’ve got the basis of a Roman kitchen.
Be smart and prepare some zip lock bags with family favorite spices, salt and pepper. This will go a long way toward making emergency meals tasty rather then barely acceptable. This lite weight addition to the bug-out-bag will prove useful, especially if you can escape harm by claiming to be a cook. Cooks are usually non combatants useful to any group including pirates, plus you get to eat!
Do yourself a favor and get a good book on outdoor food preparation, cooking and recipes.
You open the cookbook and see a recipe title or a photo that tempts your taste buds. Then you start to read the recipe, 1. First steal a chicken, realize the preparation is more difficult than you first thought, and put the book back on the shelf.
Sound Familiar?
Well here’s a simple guide to help get you started:
1. Abbreviations for Measuring
Tsp. = teaspoon
Tbsp. = tablespoon, which equals 3 teaspoons
C = cup.
Tip: Get a set of measuring spoons. The set will usually have 1/4 tsp., 1/3 tsp., 1/2 tsp., 1 teaspoon and 1 tablespoon.
Dry measure cups look like little saucepans and can be leveled off with a knife or other straight-edged tool. They come in sets like the measuring spoons. Liquid measuring cups have ounce marking lines so you can measure however many ounces you need.
Tip: Some recipes require exact measurements to turn out right so learn to measure correctly.
2. Common Ingredients
Make sure you know what you need.
Tips:
– Baking powder and baking soda are not the same.
– Ask the produce manager at the market about fruits and vegetables, the meat manager about cuts of meat.
– When trying something new, buy ONE. You can always go back for more if it turns out well.
3. Common Terminology
– Bake: Dry heat in the oven. Set oven control to the desired temperature while you’re preparing the dish to be baked. Once the light that says it’s heating turns off, the oven is at the proper temperature. Then put in the food–for best results, center it in the oven.
– Boil: Heat a liquid until it bubbles. The faster the bubbles rise and the more bubbles you get, the hotter the liquid. Some recipes call for a gentle boil–barely bubbling–or a rolling boil–just short of boiling over. Watch so it doesn’t boil over.
– Braise: A moist cooking method using a little liquid that barely bubbles on the top of the stove or in the oven. This is a good way to tenderize cheaper cuts of meat. The pan should be heavy and shallow with a tight-fitting lid to keep the liquid from boiling away. There’s a lot that can be done for flavoring in your choice of liquid and of vegetables to cook with the meat.
– Broil: Turn the oven to its highest setting. Put the food on broiler pan–a 2 piece pan that allows the grease to drain away from the food. In an electric oven on the broil setting only the upper element heats, and you can regulate how fast the food cooks by how close to the element you place it. Watch your cooking time–it’s easy to overcook food in the broiler.
– Brown: Cook until the food gets light brown. Usually used for frying or baking. Ground beef should usually be browned (use a frying pan) and have the grease drained before adding it to a casserole or meat sauce.
– Fold: A gentle mixing method that moves the spoon down to the bottom of the bowl and then sweeps up, folding what was on the bottom up over the top. This is used to mix delicate ingredients such as whipped cream or beaten egg whites. These ingredients just had air whipped into them, so you don’t want to reverse that process by mixing too vigorously.
– Simmer: Heat to just the start of a boil and keep it at that point for as long as the recipe requires. The recipe will usually call for either constant stirring or stirring at certain intervals.
Now you are ready to do the shopping and prepare that roasted beast recipe that you’ve always wanted to try!
Happy cooking…
Outdoor Cooking Gear for Survival
You never know when you’re going to encounter a survival situation. Sometimes when the weather gets bad, the grid shuts down. Then you’re left without basic necessities such as electricity.
For many, this means they don’t have a way to heat their home or prepare food. That’s why you need to be prepared in the event something happens. Preparation can make the difference between surviving and not.
You need to be able to depend on yourself if you’re faced with a short or long-term survival situation of any kind. One of the things you’re going to need to know is how to cook your food without electricity and what tools you’re going to use to do that with.
Grills and Smokers
Not all grills and smokers are intended for use with survival purposes. You don’t want to find out that you have the wrong item during a time when you desperately need it. That’s why you need to educate yourself now on which food cooking sources are the best to have stored away for emergency use.
Forget buying one that has a lot of fancy add-ons. You need a grill that’s rated for safety, has a track record of durability and will fit any change in lifestyle that you may have to face in the event of a survival situation.
For example, when life is going along the way it should, you have access to things like charcoal. But when things go south, you may not have that luxury. So you need to have a cooking method that won’t rely on any extras that might be hard to find.
If you already have a supply of charcoal in storage, then a charcoal grill is fine. But you’re going to need to have an alternative for when that runs out. Plus, charcoal isn’t exactly cheap.
Some bags go for just under $20 a bag. If you want to stock up on charcoal for survival grilling, make sure you shop during sales. You can check out places like Lowes and Home Depot around Labor Day and other popular grilling holidays and get great deals.
You also need to take care in how you store charcoal as it can self ignite starting a fire. It has to be kept dry, not wet and allowed to dry out as this is what leads to it starting to smulder, think fire in a coal bunker. Keep the area clean so any fire has no means to expand its territory.
Grills don’t have to use the convenience of charcoal, either. You can burn wood or other materials inside of a grill, which is one reason why this durable cooking tool is a popular survival cooking option.
Also, look for grills that use propane. One of the reasons you want to do this is because propane cooks evenly. Another is that it’s healthier to breathe around a propane grill, and you need to keep health in mind during a survival situation.
Plus, you can get a lot of cooking and heating uses in just one canister of propane. You can get a gas grill but in the event that you’re in a survival situation, you may not have any access to gas if the stations shut down and no deliveries are coming.
Instead of grills, you can also use a smoker. If you’re not familiar with this type of cooking resource, you’ll find that they’re also commonly referred to as a “pellet grill.” That’s because they cook by using wood pellets.
It’s the heat generated by the pellets that will cook whatever food you’re having. You get better flavor as well as better temperature regulation over a charcoal grill with a smoker.
The downside is that a smoker isn’t cheap.
You can expect to lay out a pretty penny when you buy one. However, it’s a survival investment that will pay off in the event you lose your normal food cooking resource.
The upside is that a smoker can be used as a heat source and the pellets used in one don’t burn as fast as charcoal does.
Fire Pit and Cast Iron Cooking
When you’re in a survival situation and need an alternative cooking method, you can use a fire pit. But you’ll want to have some experience with this before you need it to help make a stressful situation easier on yourself.
Fire pits can vary in structure. You can create one from a hole that you’ve dug. Or you can buy a readymade fire pit and set it up in your backyard. The purpose of creating a fire pit is to be able to safely use fire.
Simple fire pits use wood to feed the fire, and this can be a relatively inexpensive way to cook your food. Even in a survival situation, there will always be trees around. If you want to build a fire pit, you’ll need to dig a hole and surround that hole with something like bricks or stone to help keep the fire contained.
To cook on top of the fire, you just need a grate. Other fire pits aren’t as simple, but they can be more convenient to use. Propane fire pits can be taken with you if you have to bug out.
You just need to buy one that’s portable. These types of fire pits come in a variety of sizes and the cost will vary, too. There are also gel fire pits in various sizes. These cook with a simple mixture of fuel and are designed to be used whether you’re in or outdoors.
Unlike other types of fire pits, you don’t get the thick smoke from burning fuel, which is one of the reasons this type is so popular. You can buy the fuel cannisters in bulk so you can be prepared well in advance.
Cast iron cooking is a skill that you may need in a survival situation. Plus, cast iron is extremely durable and can withstand higher temperatures than most of the pots and pans available that aren’t made of that material.
You’ll want to have some basic cast iron dishes that can help you be able to cook during a survival situation. The first one is a skillet. There’s a lot of different types of foods you can cook with this.
You can make things like casseroles or use it to fry freshly caught fish. Get a cast iron griddle, too. This can be used to cook things like eggs and sausage or bacon. You can also make grilled cheese or fry up some burgers.
This is perfect if the electricity goes out and you want to cook up the food in your fridge that will spoil soon. A cast iron Dutch oven is a must have for surviving because you can make a lot of food at once.
For example, you can use it to cook beef stew or make a soup. These cast iron pots can go into an oven, too. The handy thing about cast iron cooking is that you can use them to cook using a grill but you don’t necessarily have to have that.
You can put cast iron right over a fire. These dishes are made to cook food evenly and if they’re properly cared for, can last for generations. When cooking with cast iron pots or skillets, the thing you need to be careful about is making sure that you maintain a steady temperature. When you have fast temperature changes with cast iron, it can cause it to crack due to thermal shock.
Solar Cookers
Each survival situation is going to be different. You might have one where the electricity goes out and you don’t have a way to cook something hot for 24 hours. But sometimes, there are long lasting threats to your normal life.
You can have a grid go down on a major scale. Or a hurricane or tornado could upend your city and life just won’t get back to normal for months. That’s tough but not being able to have cooked food can make a hard situation even more difficult.
Having a way to cook – such as with a gas grill – can ensure that you have a way to eat warm food. But, the problem is that you can’t always have access to fuel. You don’t necessarily have to have fuel in order to cook.
You can use a solar cooker instead. A solar cooker uses the sun’s energy to cook food. It doesn’t take a lot to make that happen, either. All you need is a sunny day. By using a solar cooker, you can make a wide range of dishes.
Plus, you can keep water hot so that your family can wash up. When you use a solar cooker and there is a shortage of cooking fuel, you won’t have to worry. You’ll still be able to get a meal.
Plus, these cookers are cheaper in the long run because you’re not having to buy extras like the fuel. You also won’t have to find a safe way to store fuel since these cookers don’t use any.
It’s difficult to overcook food using a solar oven so you can get great tasting meals consistently. You can make a solar cooker yourself. Creating one as a DIY can be easy or difficult depending on how handy you are.
You can also buy one. How much it costs will depend on what type you buy. If you buy a solar bag, you can find that for less than $50 – but bags don’t always hold in the heat the same way.
The kinds that you can buy are usually made with better construction and can cook foods faster. Plus, some of them also have built in ways to read the temperature so you’ll know what your food is cooking at.
If your solar cooker does not have a thermometer, then you’ll need to buy one because otherwise, you’re guessing the internal temp of your foods and that’s just not safe with certain dishes.
There are some other things you’ll need to remember when cooking with a solar cooker. You’ll need to be sure that any of the pots or pans you use are dark. That’s because light colored dishes don’t get as hot as dark ones do.
Use lids to help keep the solar heat trapped. You’ll also want to be sure that you use metal when you’re baking something. These will have a more even cooking rate from end to end.
Plus, they also hold in heat. If your first few attempts at cooking with solar power don’t work out the way you’d hoped, don’t give up. It may take a few tries – but it’ll be worth it in the end.
Outdoor Stoves and Ovens
If you have time, you can build an outdoor oven yourself. But this is an option for people who prepare in advance. Sometimes though, in a sticky situation, you may not have had that option or that foresight.
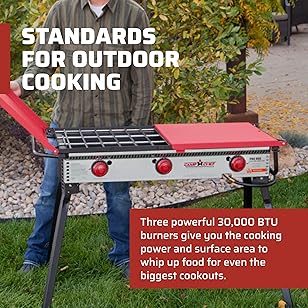
You can still have a way to cook your food by buying an outdoor stove or oven. These can range from the super simple options, such as a small holder for pots that screws onto a propane tank to one with an elaborate setup.
You can find one or two burner gas stoves. These usually have foldable legs and are portable. The larger the cook space, the more people you can cook for in a shorter amount of time.
So keep that in mind when you’re choosing the size. If you’re the only one to cook for, then you’re better off with a single burner propane stove. These are high heat stoves and can be used with a variety of different cooking gear – including a wok.
A folding stove that burns solid fuel is lightweight and portable, but still strong enough to be able to hold something like a cast iron pot or skillet. Lightweight cooking gear is important in the event that you have to bug out of your current situation or you’re planning on moving areas frequently.
You’ll want to consider buying an outdoor oven so that you’re prepared when there’s a situation where you don’t have your normal cooking methods available. Some people hesitate because they think that outdoor ovens are expensive.
They’re not. Others hesitate because they think that these ovens are heavy but they’re not that either. You can find them for less than 40 pounds. These types of ovens can use a propane tank and you can bake things in them just like you would the oven in your home.
A few of the outdoor ovens don’t have the top burners and while that can save you a little on the cost, you’re really better off buying the models that also have the top burners because this way, you get both stove top cooking as well as in the oven cooking.
This will make it easier to be able to cook the same way you did with your usual cooking methods. You can find these ovens with one rack or with two. For a decent one, you can expect to pay between $200 to $300.
But there are ones that are a lot more expensive. While those might be great for outdoor entertaining, when there’s an emergency situation, you don’t need something that costs a lot.
Keep in mind that some of the outdoor ovens are labeled as pizza ovens. This makes some people hesitant to buy them because they think the use is limited. But whatever you would normally cook in a regular oven, you can also cook in an outdoor pizza oven.
Safety Tips and Accessories to Consider
In your normal day-to-day routine when everything is as it should be, you know all about staying safe and keeping your family safe. You know the accessories that you need. But all that changes when your circumstances change.
When you’re living in a survival situation, the rules can be very different and that means you need to update safety precautions for your children. Because the cooking methods may have changed, you’ll need to teach them about the new cooking safety precautions.
They need to be warned about being too close to a fire if you’re using flames to cook with. It’s basically just updating your children’s knowledge when your living circumstances change.
If you’re cooking with cast iron dishes, there’s one thing you need to be aware of. Unlike plastic or coated handles, the handles of cast iron dishes get hot – hot enough to cause a blister burn.
So when you’re removing cast iron off a fire, be careful. Protect your hands with oven mitts that are rated for higher temperature levels. You can also buy a silicone handle for a cast iron skillet.
This slides right over the handle and is made to withstand nearly around 475 degrees in temperature. For your survival situation, you’re going to want to stock up on supplies like lighter fluid and gel heat sources if that’s what you’re using.
If you do plan on using wood or charcoal, stock up now. You can buy packs of starter fuel for camp stoves that will last a couple of hours per container. So you need to buy according to how many hours of cooking you think you’ll be doing or until you think your situation may end and life returns to normal.
If you want to invest in specific cookware that can be used for cooking outdoor on grills and ovens, you can find those as complete sets and some of those have heat resistant handles which make them better suited for cooking in nontraditional ways.
You might want to invest in a cheap meat thermometer so that you’ll be aware if any meat is undercooked. You don’t want anyone getting sick due to a mistake on the part of whomever is doing the cooking.
If you’re going to be catching your food in a water source, you’ll want to get a grilling basket for fish and other things. This can be placed over an open flame or grill and it will cook the enclosed fish to perfection for you without it falling apart.
Another good thing to own in case your outdoor lights aren’t working is a set of barbeque grill lights. These can attach onto your grill and shine a light on the food using bright LEDs.
Last, but not least, make sure you get the proper cleaning tools so that you can consistently cook on your outdoor method of choice without facing the possibility of anyone getting sick or attracting bugs and critters to your cooking area.
Stone Age Cooking for Survival
Stone Age cooking involves methods that go back to the days where humanity lived in a primitive manner. Where humans didn’t have the simple luxuries to make life easier that we have today.
We’ve gotten so used to these modern cooking methods using appliances and cookware to make food, that most people would have no idea how to cook properly without any of those machine-made tools.
But what if disaster were to strike? In a survival situation, there could be an extended or even indefinite period of time where modern appliances and tools would be useless. Things like ovens and microwaves require power, and power outages wouldn’t be unlikely in an emergency event.
Even other modern cooking methods that don’t require electricity often require some other form of modern or pre-made fuel. Some appliances run on gas or lighter fluid, and rely on things like matches to cook.
Aside from appliances, tools like pots and pans could be too bulky and heavy. When you’re carrying a survival bag, you need to keep it light so that you can be agile. They’d also make a lot of noise rustling around in your bag, constantly clinking together in situations where you might need to stay quiet.
These primitive stone-age cooking methods use nothing but natural materials. Knowing how to cook with only what you find in nature is an extremely important skill for all survival preppers to know. These methods will keep you and your group fed in the most extreme conditions.
Cooking Over a Fire
There are multiple ways to cook over a fire. These methods are all great options when it comes to cooking with only natural materials. However, for any method that involves fire, you also have to be educated on how to start a fire in the wild.
There are many primitive methods of starting fires, so try a few and see what’s easiest. It’s good to know multiple methods in case you ever can’t find the materials for your favorite one.
Also make sure you know how to start fires outdoors in a safe manner. You don’t want to end up injured or starting wildfires from acting reckless, so do extensive research and learn how to try fire-starting methods safely.
The first direct fire cooking method is roasting. You’ve probably seen this cooking method before, usually with a whole pig being rotated over a fire. Roasting is a method where you put your ingredients on a long stick and slowly cook them over the flames and hot coals.
Usually this method is done by building two triangles out of pieces of wood that cross at the top with cordage, leaving a divot for the stick with the ingredients to sit on. This stick is rotated throughout the cooking process so that the heat will be distributed evenly.
Another method of cooking with fire is grilling on hot stones. This method is very simple and doesn’t take a high skill level in building. The basic idea of grilling on hot stones is to build a fire, build up smaller rocks around it and place a large, flat rock on top of it, the other rocks creating a little space between the rock and the flame to let the fire continue to burn.
Some people opt to put the rock next to their fire instead of directly on top of it. Either method will work. When the stone gets hot enough, you can then cook your food on it in a similar fashion to a modern stove or grill.
You can move or flip your food using natural materials, too. For example, you may find a stick with prongs on it that you could use as a spatula. You could also use two twigs like chopsticks to grab your food and turn it over.
One thing you need to be vigilant about is the type of rock you’re using to cook. Generally, most rocks will work fine. However, some certain types of rocks would combust, damp rocks can explode if they were placed on or right next to a fire.
Make sure you learn about the rock types in your area and their heat resistance levels, and make sure you know which ones to avoid. Another method of primitive cooking is pit cooking.
Pit cooking is where you dig a hole into the ground and start a fire in it, and place a cooking method over it. Some people like to put rocks on the fire and cook on them, and some people like to roast their food over the pit’s heat. This method might be more ideal for windy weather, because it’d be easier to contain to prevent anything accidentally catching on fire or burning.
Cooking with Indirect Heat
One way people primitively cook with indirect heat is by steaming the food in leaves or animal skin. These options are alternatives to things like pots and pans that we’d usually use to hold our food while cooking.
You can wrap up your food in either of these materials and use them on many different heat sources. They’d be useful when cooking on a hot stone or in a pit cooker. You can also use these in earth ovens.
Earth ovens are manmade ovens that are built using things like stone or clay, usually in a dome shape to trap in heat. These ovens can be built over pits or completely above ground.
Using this method, some people build the fires on the same layer as the dome, sticking their wrapped food into the hot coals. Some prefer to have a separate pit for the fire and lay stones or bricks over the flame to cook on that instead.
Food Preservation Methods
Dehydrating is one method you can use for food that requires no materials. Dehydrating food gets rid of the moisture, allowing it to not go bad as quickly. This method can make your food last months to even a year.
One way you can dehydrate food is by letting it dry out in the sun. This will be the fastest method. The hot rays of the sun will heat up the food, making moisture evaporate. This leads to dehydration.
Another way you can dehydrate food is by letting it air dry. This method doesn’t require the sun or any heat at all, and can be done indoors. This method wouldn’t work well in humid climates, because the air needs to be dry in order to dry food.
Dehydrated foods can be eaten as is, but can also be rehydrated. You can rehydrate the dehydrated food by adding clean water to the food and cooking it over a heat source. This will return the food into its normal state and may make it more enjoyable to eat.
Another method of food preservation is to smoke your food. You can smoke the game that you catch on a smoking rack over hot coals. There are many different smoking rack builds, but pretty much anything that will hold your game over the smoke source will do.
When smoking meat for preservation, it needs to be dry. Meat with moisture in it will spoil quicker. Your ideal texture for smoked meat for preservation purposes should be like a jerky consistency.
Since smoking is a heat source, it’ll dry out the meat in a similar way that sun drying would. This will help the moisture evaporate while also giving the smoked food a pleasant flavor. These foods can last multiple days longer than your average cut of cooked meat, making it good for survival situations.
These many cooking methods are simply necessities during a survival emergency. To ensure you have a full understanding of these Stone Age methods, practice them yourself at home.
Make sure you avoid practicing with modern tools – this defeats the purpose of the methods. Also make sure you practice these very safely, especially because you’ll be dealing with fires and hot surfaces.
For primitive cooking, it’s also extremely important that the materials you use and the food you eat are both clean. Use clean, hot water to disinfect your materials. If boiling your materials is an option, that’d be even safer. Don’t eat any meat or produce that looks or smells like it’s off or not fresh.
Bonus: Dining With the Romans
Numerius was a slave and ate one meal a day consisting of gruel made with cracked wheat. While Spurius a plebian purchased his meals from street vendors, food shops and taverns located near large public buildings and bathhouses. Marius a patrician and a member of the Roman senate had the means and the influence to enjoy his meals that were cooked and served by slaves in one of two spacious dining areas within his home. Quintus a freedman lived in the country where he grew vegetables and raised some livestock for an absentee owner. He and his family ate fresh produce, mashed beans, bacon and cheese that were cooked with fresh herbs, olive oil and salt.
Breakfast was not much of a meal and it consisted of a cracked wheat porridge or bread dipped in wine that was mixed with honey and water. Depending upon one’s status, dates or olives were included.
Cracked Wheat Porridge
1-cup Bulgar wheat crushed 2-cups water 4-Tlbs. olive oil 1-tsp. salt
Directions: In a skillet, heat the olive oil and stir in the Bulgar wheat until it is well coated with the olive oil. Remove from heat and add the water and the salt. Drizzle some honey in the porridge for added sweetness. Serve with some fresh figs, dates or dried apricots.
Lunch was the midmeal of the day. For the majority of the Roman citizens, it was either purchased from the street vendors or food shops and taken home to enjoy. Plebians and freedmen ate bread, fruit, cheese or leftovers from last night’s supper. Marius like the other patricians ate his lunch at home or purchased his food from the street vendors. Dinner was served late in the afternoon, and it was the main meal of the day. The plebians and the freedmen ate their dinners at the taverns. The food was plentiful, and the ingredients were fresh. Wine was diluted with honey and some water and served at every meal.
Grilled Sardines with Garum 8-whole sardines, grilled 4-cups grape juice 2-Tlbs. anchovies paste 1/4-tsp. oregano
Directions: Cook the grape juice until it is reduced down to one-tenth of its volume. Mix in the anchovy paste and the oregano to the reduced down liquid. Grill the sardines and pour a portion of the garum sauce over them. Serve with some flat bread, ripe cheese and olives.
After a long day at the forum, Marius a Roman senator arrived at his spacious home where he was greeted by slaves. He joined his family and guests in the dining area where appetizers were being served from a bronzed donkey. Everyone took individual portions of hot sausages, dishes of olives, crabs, figs, bacon and tomatoes eating them with their hands. For the entree, a whole pig was cooked, and swordsmen cut individual pieces for the diners. After the main meal, dessert was served in another dining area where the wine flowed like water. All types of fruit were offered by the slaves. Poppy seeds mixed with honey as well as sweet cakes mixed with honey, nuts and chopped fruits were a special treat.
Pork Roast with Prunes, Apricots and Figs 3 or 4 lb. lean pork roast, with a slit cut into the side of it 1/2-cup dry prunes, apricots and figs, chopped 1-Tlb cooking oil 1/4-tsp salt 1/4-cup honey 1/2-cup water
Directions: Have the butcher cut a slit or a pocket into the side of the pork roast. In a saucepan add the dried fruit, the honey and the water. Simmer the dried fruit until tender. Stuff the cooked fruit into the slit of the pork roast and tie it with a string. Rub the salt on both sides of the pork roast. In a skillet, heat the cooking oil and sear both sides of the pork roast Transfer it to a crock pot cooking for four hours on high and then turn it down to low four more hours. Test the done pork roast with a meat fork to make sure it is cooked through. The beverage of choice was Mulsum. Warm one-half cup of honey and add it to a bottle of Maderia dry white wine. Serve it chilled.
As soon as the sun went down, Quintus a freedman walked from the fields to his home where his wife and daughters were preparing fresh vegetables and a whole chicken stuffed with fresh herbs. Their gardens produced fresh vegetables and they raised chickens and pigs. Quintus had a small vineyard where he grew the grapes for his own wine. Tonight, they were making his favorite soup of broad beans that were mashed and seasoned with herbs, bacon and small chunks of cheese.
Broad Bean Soup 2-cups of small pasta, cooked 3-cups of broad beans, peeled 1-cup of bacon, precooked 1-onion, chopped 1/2-can tomato sauce 1/4-tsp pepper 1/4-teaspoon sea salt
Directions: In a soup pot or a Dutch oven, sauté the bacon and when it is almost done add the chopped onion and the tomato sauce. Add the peeled broad beans and the salt. Cover the beans with cold water. Simmer on medium low until the beans are tender. If they are dense after they are done cooking add more water. Pour in the cooked pasta. Let the soup cool and serve it with lots of pepper and pecorino cheese. Serve with a piece of flat bread and some olives.
1. Social Position And Food Of The Roman Empire. Jean Preston, Dr. Christian Renaud. December 2,1997. http://www.2cartage.edu/outis/food 2. Essay sample on: Ancient Roman Meals And Eating Habits. http://www.essay.com 3. Broad Bean Soup Recipe. http://www.eatit.com
A love for ancient history, the author has studied some Philosophy and History.


 November 4, 2015
